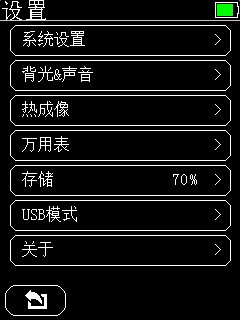
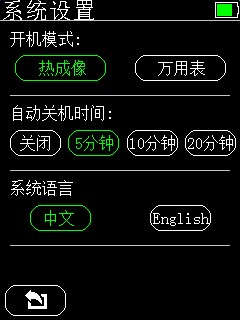
1. System setup
Power on mode: The power on default enters the thermal imaging mode or multimeter mode.
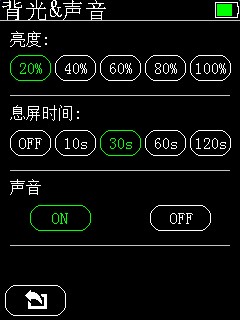
2. Backlight & sound settings
Reduce the backlight brightness and open the rest time can effectively extend the battery life.
The on/off gear buzzer in the multimeter is not affected by the sound off.
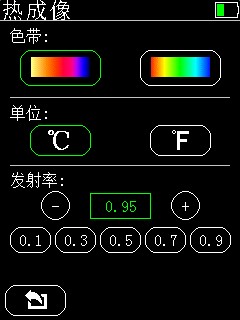
3. Thermal imaging settings
Color band: You can modify the display relationship between thermal imaging temperature and color.
Unit: Modify the unit of the overall measurement temperature.
Emissivity: you can set the emissivity according to the measured object, you can click the bottom gear button to set it quickly.
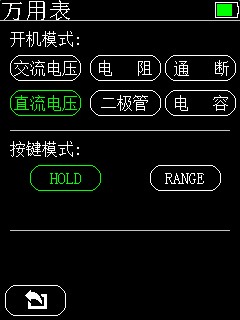
4. Multimeter settings
Power-on mode: Set the default gear when the multimeter is first entered at power-on.
Button mode: Set the function of HOLD/RANGE multiplexed button at the bottom of the screen.
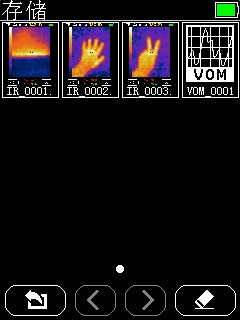
5. Storage settings
You can preview the saved thermal imaging screenshots, click the thumbnail to open its corresponding image, and the image can be deleted after opening; in the thumbnail state, click the erase button at the bottom right corner of the screen to format the storage.
6. USB mode
Enter this USB mode to connect the USB of the device to the USB of the computer to view the files in the device; if you exit this mode USB will be disconnected
(Note: To avoid electric shock, please remove the meter pen before connecting the USB to other devices)。
