The multimeter has DC voltage, AC voltage, resistance, diode, on/off, capacitance, frequency, duty cycle and other data measurement functions, and can perform automatic gear measurement, manual gear measurement switching (default automatic gear) and HOLD data saving function, and has a powerful data waveform recording function, with the upper computer software can realize the voltage waveform reproduction function.
(Note: To avoid electric shock, please remove the pencil before connecting the device by USB, and the multimeter function will be disabled when charging)
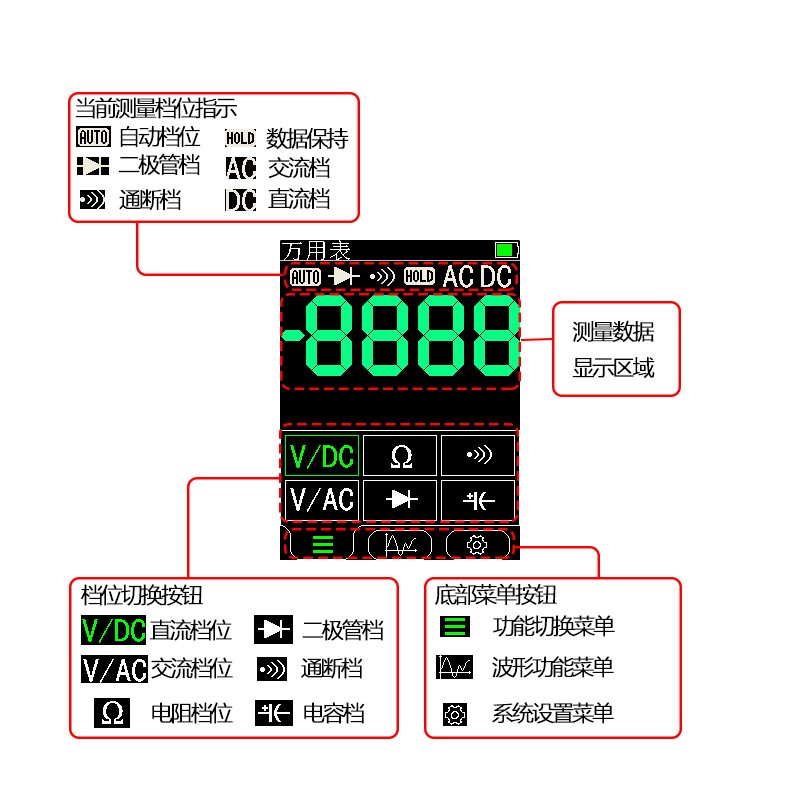
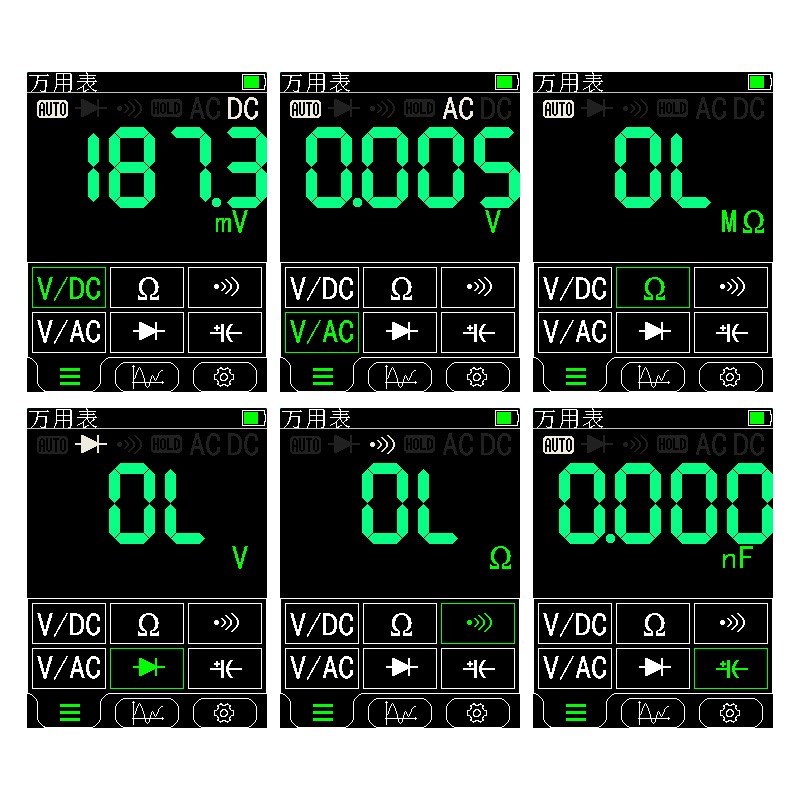
1. Gear switching
Click on the button in the gear switch button area according to the data you want to measure to automatically switch to that gear, and the current measurement gear icon will be displayed at the top, as shown in Figure 3.
2. Frequency, duty cycle measurement
Press the physical button “Hz/%” at the bottom of the screen in the AC/DC voltage range to enter the frequency measurement, then the measurement unit becomes “Hz”, press the physical button “Hz/%” again to switch to duty cycle measurement, then the measurement unit becomes “%”, press the button again to switch to the voltage range.
3. Manual and automatic gear switching
First of all, you need to confirm the current key setting of the device is RANGE function, you can open Settings->Multimeter->Key Mode to set the multiplexed function of the key. Press the HOLD/RANGE button at the bottom of the screen to switch to the manual range, each press in the manual range mode jumps up one grade, and then press the button again to jump to the lowest grade after reaching the highest grade, and so on. Frequency and capacitance measurement can not be measured manually. Click on any other position on the screen to exit the manual range mode.
4. Data retention function
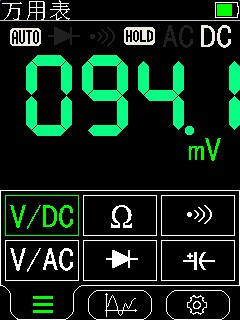
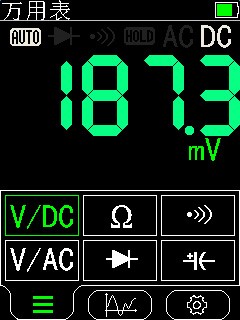
First of all, you need to confirm the current key setting of the device is HOLD function, you can open Settings->Multimeter->Key Mode to set the multiplexing function of the key. Press the HOLD/RANGE button at the bottom of the screen to turn on the data hold function, then the HOLD icon will be displayed on the screen as shown in Figure 4.
5. Data waveform function
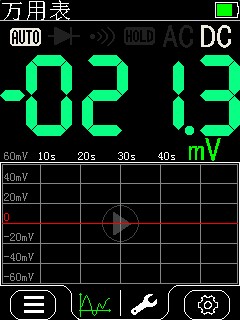
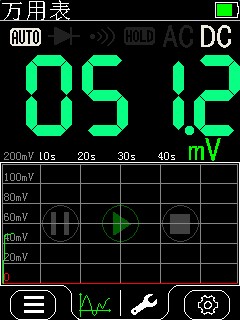
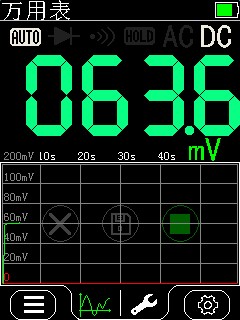
Click the “waveform function” button in the menu button at the bottom of the screen to enter the data waveform function, click the start button in the middle of the screen as Figure 6 to record the current measurement value, then the buttons on the screen change to three buttons such as Pause, Start (green) and Stop as Figure 7, click the Stop button then the buttons on the screen change to Cancel, Save, Stop (green) and so on, Click the Save button to save this measurement result, click the Cancel button to delete this measurement result and start the next measurement. The saved data can be seen in the Settings->Save menu, and the specific waveform data needs to be viewed in the computer using the supporting software.
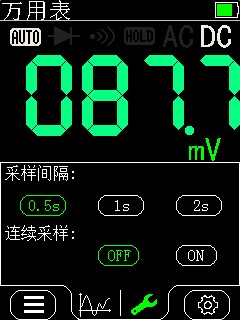
The interval of data measurement and continuous sampling can be set in the Setup menu at the bottom of the waveform menu as shown in Figure 9. The sampling interval can be set to 0.5 seconds, 1 second, 2 seconds, etc.; continuous sampling or non-continuous sampling can be set, and continuous sampling will overwrite the original data from the starting position when the data collection overflows to continue recording.
